


PULT 6203 (12Bit Fix)
$16.99
Looking for style and function? Our lamps combine both to enhance your decor!12 bit coded Remote control compatible to all DUCATI automation gate & garage door openers?manufactured between 2001-2015?compatible to all Ducati’s fix codedgate & garage door openers?manufactured since 2001?Warning: not compatible with today’s Ducati openers witch are all rolling…
Looking for style and function? Our lamps combine both to enhance your decor!
12 bit coded Remote control compatible to all DUCATI automation gate & garage door openers?manufactured between 2001-2015?compatible to all Ducati’s fix coded
gate & garage door openers?manufactured since 2001
?
Warning: not compatible with today’s Ducati openers witch are all rolling coded!
-
INSTRUCTIONS:
?
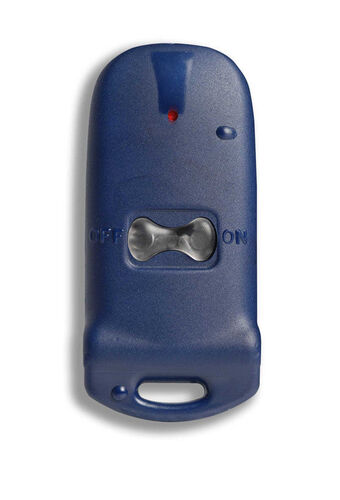
Remote control ?6203 is a 12 bit coded remote control 433 Mhz. It comes with blue ?plastic case , and?transparent light gray push buttons ( previous versions also in?see-through plastic case).
It has 3 channels of transmission. one channel is pushing button ��ON�� , second channel is button ��OFF�� and the third channel?by?pushing buttons ��ON�� +��OFF�� together.
The push buttons are pre-coded in by manufacturer for a standard use as follows:
1�� channel of transmission = push button ��Off�� is coded for Gate operators
2�� channel of transmission = push button ��On�� is coded for Garage operator
3�� channel of transmission = ON+OFF at the same time, to be used for any other operator
As you purchase your operator, after having installed it and tested with standard codes on your remote, we recommend to delate all standard codes from your remote and your electronic panel memory and to set and memorize a new private secret code to prevent others customers from opening your garage or gate.
TECHNICAL DATA
- Working frequency:433,92MHz?
- Transmission Channels: 2
- Radio code protocol: DUCATI’s rolling code
- EN tested & certificated to comply R&TTE ETSI EN300 220-2 norms CE 0681 !
- USA tested & certified FCC ID:OLS137925764 (# 6203)
?
To set a new code in the remote transmitter follow this procedure:
- Press the remote transmitter ON and OFF buttons at the same time until the Led goes on with fixed light.
- Release the keys, the Led goes off. Now the remote transmitter is in the programming function.
- Press and release the push button corresponding to the channel to be programmed (ex. ON , OFF or ON +OFF), the Led goes on for approx. one second.
- Now enter a personal 12 bits code by pressing OFF ON buttons for 12 times composing your 12-pulse personal coding string you had previously marked. After each pulse wait until the led goes on and then off.
?If you have not entered all the set 12 codes, the remote transmitter will stay in the “programming”. ALL THE 12 CODES HAVE NECESSARILY TO BE ENTERED ALSO IN CASE OF ERROR DURING PROGRAMMING. To carry out a new programming repeat the instruction from point 1.
- After having reached the thirteenth pulse, the remote transmitter will blink quickly various times, which means the new programming has been accepted. If this would not occur, repeat the operation from point 1.
Important : we recommend to copy your personal code?string ?to avoid loosing it
How to set the new ?transmitter code of your remote control in the electronic board of your opener: “SELF-LEARNING” function
Caution: first of all clear the pre-coded standard code by pressing and holding pressed the P1 key on your opener electronic board for 20 seconds until the red led blinks. this procedure will delate all codes previously memorized in the electronic board of your opener. Then:
- Press the P1 push button (one time only!) on your opener electronic board the red Led light will switch on
- Release P1
- Press the push button the remote transmitter where you have programmed your personal code for some seconds, or even several times until the opener start to work. The receiver of electronic board has memorized your remote control 12 bit code.
Be the first to review “PULT 6203 (12Bit Fix)”
You must be logged in to post a review.
Related products
Remote controls
Remote controls
Remote controls
Remote controls
Remote controls
Remote controls
Remote controls
Remote controls
Reviews
There are no reviews yet.